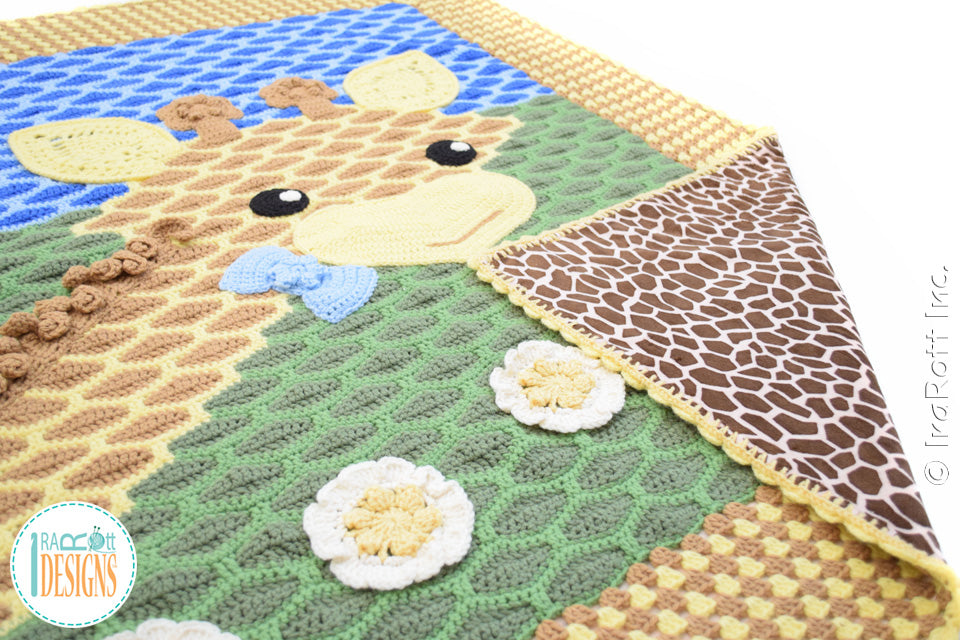
A backing adds warmth and comfort to a blanket, serving as a finishing touch for projects with stranded colorwork and concealing yarn floats between layers. Knit and crochet blankets require sewing the layers together evenly throughout the entire surface, as they stretch differently than fabric. Similar to making a quilt, this ensures a secure and balanced construction.

What You Need
- Self-healing cutting mat
- Quilting ruler
- Rotary cutter with a 45 mm blade
- Fabric scissors
- Skip-cut (or skip-stitch) rotary cutter blade (45 mm) for wide space cuts
- Wonder clips or any other clips (optional)
- Minky fabric (or Fleece fabric) – slightly larger in size than your finished blanket
- Lint roller (optional)
- Curved basting pins or safety pins
- Tapestry needle
- Sewing machine (optional)
- Crochet hook 5 mm (H)
- Worsted weight yarn (Medium/4)

Preparing Fabric
- Wet block your knit or crochet blanket before adding lining. This will help you balance the shape of the blanket and keep the edges straight.
- Napped fabrics need to be placed on the blanket with the nap running down for more natural feel and look.

Cuttings Fabric
With the wrong sides together, lay the backing fabric on top of your knit/crochet blanket. Align 2 edges of each piece, then fold and trim the extra fabric from the opposite edges to make the backing the same size as your blanket (no need for seam allowances).


TIP: A sticky lint roller is very handy for keeping your working area clean when you cut any fabrics with nap.

Perforation
Change the blade in your rotary cutter to the Skip-cut (or skip-stitch) blade. Position the quilting ruler 3/4″ (19 mm) from the edge of the fabric and roll the skip-cut blade along the edges of the ruler to create perfectly-spaced perforations. Repeat around the entire edge of the backing fabric.


Crocheting Around Edges
Use any medium weight yarn (4) and a 5 mm (H) hook to finish the edges of the backing fabric. Make a slipknot and insert the hook from front to back through the perforation a few inches away from the corner. Yarn over and pull it through the perforation, yarn over and pull through both loops on the hook (first sc made). Work around the perforated edge, rolling the fabric edge over to the wrong side as you go – *[Ch 1, sc in next perforation] repeat to the corner, (sc, ch 1, sc, ch 1, sc) in corner, repeat from* all the way around; sl st in top of beg st. Fasten off, leaving a long tail for sewing.


Attaching Backing
With the wrong sides together, align the edges of the blanket and backing. The backing should be slightly smaller than your blanket after the edges are finished. Place clips evenly along the first edge to prepare the layers for sewing. You can use basting pins instead of clips, but try to avoid straight pins as they can easily get lost in-between crochet stitches. Using a tapestry needle and the long tail from finishing, backstitch along the edge, removing clips as you go; repeat around the remaining edges.


Basting
Basting is a technique used for holding the layers of the quilt temporarily while it’s being quilted. To begin, flip the quilt to the right side and flatten out the layers. Pin both layers of the quilt by placing basting pins every 3″-5″, working your way around the quilt.


Quilting
For machine tacking, be sure to clear your working space as you will need to lay out and push the quilt around your sewing machine. Thread your machine and set the stitch length to 2. Insert the quilt through the throat of the machine to start quilting. Using basting pins as guides for stitching, sew 3-5 stitches forward and then reverse, removing basting pins as you go; repeat 2-3 times in each spot. You can also set your sewing machine for zig-zag with zero stitch length, instead of sewing forward/reverse. Use an automatic thread cutter before moving to the next stitch point, or move without cutting thread and then cut the floats between tacking spots at the end of work.


View this brief video showcasing the quilting process.
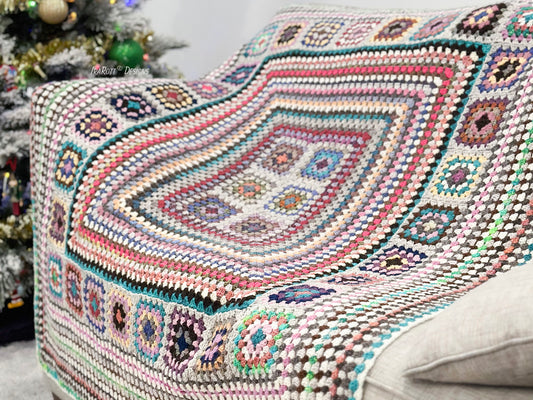
Presenting my completed crochet quilt! The layers remain securely joined across the entire surface, ensuring they stay together without separation.
Don’t worry if sewing machine is not an option for you. Instead of machine tacking, you can simply tie your quilt using matching yarn scraps or embroidery floss. Just thread the needle and insert it from back to front through the quilt layers leaving a 2” (5 cm) tail at the beginning, then back up through a stitch away from the initial spot. Repeat one more time to reinforce. Cut yarn, leaving a 2” (5 cm) tail at the end. Tie the ends together with a double knot on the back of the quilt. Trim the tails to approximately 1” (2.5 cm).