My new book, Jelly Roll Animal Quilts, features more than 40 animal‑inspired projects - quilts, rugs, wall hangings, placemats, mug rugs, and more. Every design begins with precut 2½″ fabric strips, which are sub‑cut into rectangles and transformed into 60° shapes by trimming the corners in a special way.
In this post, I’ll walk you through the basics of cutting and piecing these shapes. You can practice the technique while making a charming bonus project: The Moonlit Bat Quilt & Pillowcase. Be sure to download the free pattern HEREbefore you begin.

Cutting 60° Shapes
To create the 60° shapes used throughout the book, you’ll trim the corners of your rectangles using a 60° corner trimmer or a ruler with trimmed 60° corners. My go‑to tools are:
- Marti Michell’s 60° Corner Trimmer
- Hex‑N‑More Ruler by Julie Herman of Jaybird Quilts
Whatever tool you choose, avoid rulers with pointed 60° corners. If the point meets the fabric corner, you’ll accidentally trim off the seam allowance and your shape will be too short.
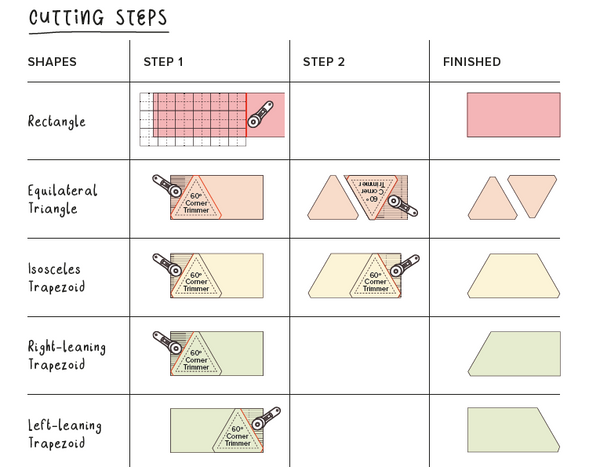
For the Moonlit Bat block, you’ll cut the following shapes from 2½″ strips:
- Rectangles
- Equilateral triangles
- Isosceles trapezoids
- Right‑leaning trapezoids
- Left‑leaning trapezoids
Follow the step‑by‑step diagrams in the pattern for each shape.
No Special Ruler? No Problem.
If you don’t have a specialty ruler, you can use the 60° templates included in the book or print THIS FILE at actual size. Cut out two paper templates:
- One for trimming the sides
- One for trimming the corners
Then:
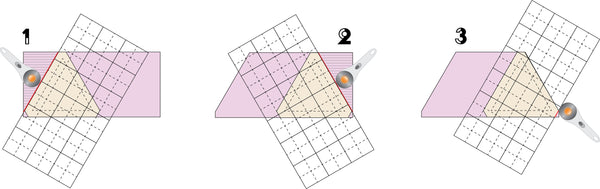
- Tape the first template behind your quilting ruler, aligning the triangle’s side with the ruler edge and the dashed line with the ¼″ mark.
- Tape the second template to the back of the ruler (or a second ruler), aligning the trimmed corner with the ruler edge and the dashed corner with the ¼″ mark.
- Use the first template to cut the sides (steps 1–2), then use the second to trim the corners (step 3).
Tips for Layering Strips Before Cutting
- For symmetrical shapes, place two strips wrong sides together and cut as one.
- For identical shapes, layer strips right sides facing the same direction.
- Equilateral triangles and isosceles trapezoids can be cut from multiple layers facing either direction.
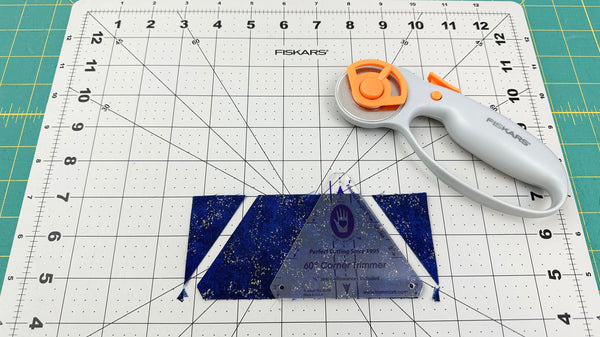
- A rotating cutting mat (I love the Fiskars Rotating Self‑Healing Mat) makes trimming corners faster and safer.
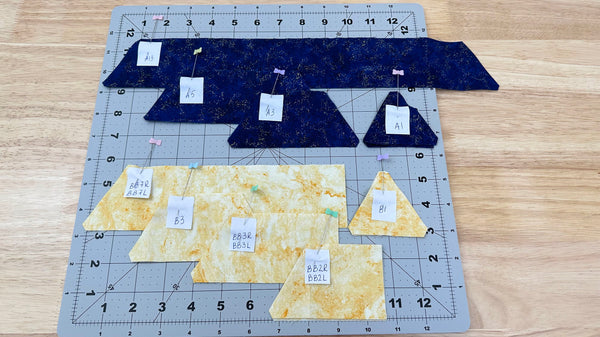
Making the Bat Block
Cut all the shapes listed in the pattern and label them as you go. Masking tape, sticky dots, or pinned paper labels all work well. A true ¼″ seam allowance is essential.
Use a patchwork foot and shorten your stitch length to 1.5–1.6 mm. A straight‑stitch needle plate is helpful, but if you don’t have one, use a small scrap of fabric as a leader to prevent puckering.
When sewing 60° shapes, the trimmed corners align perfectly (no dog‑ears), no guesswork. Simply pin, sew from corner to corner with a ¼″ seam, and avoid trimming the sides to prevent distortion.

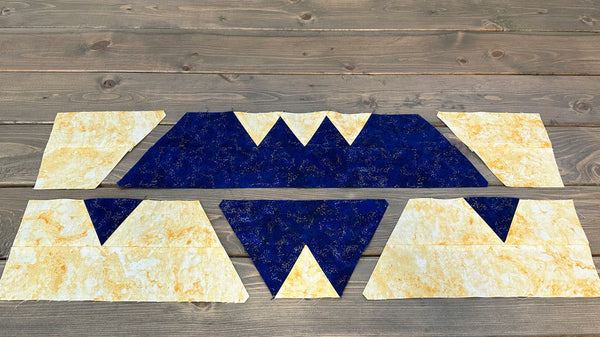
Construct the six main units of the bat block following the pattern, pressing seams open for accuracy. Sew the units together in order, add the three background strips to the top and bottom, and trim the block to 20″ × 20″.
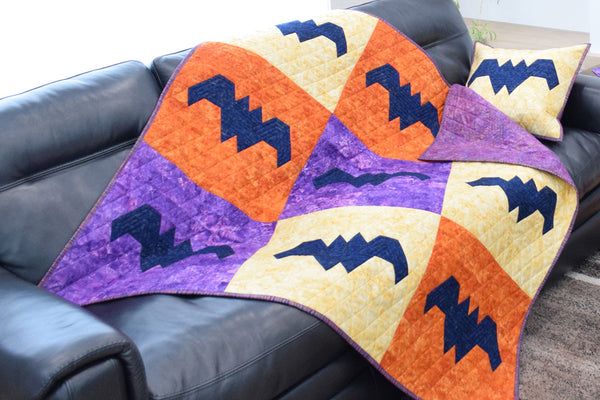
Finishing the Quilt
Make:
- 3 bat blocks with background B
- 3 bat blocks with background C
- 3 bat blocks with background D
Arrange them as shown in the pattern diagram, sew into rows, then join the rows. Create a quilt sandwich, quilt as desired, and bind using 7 Jelly Roll strips.
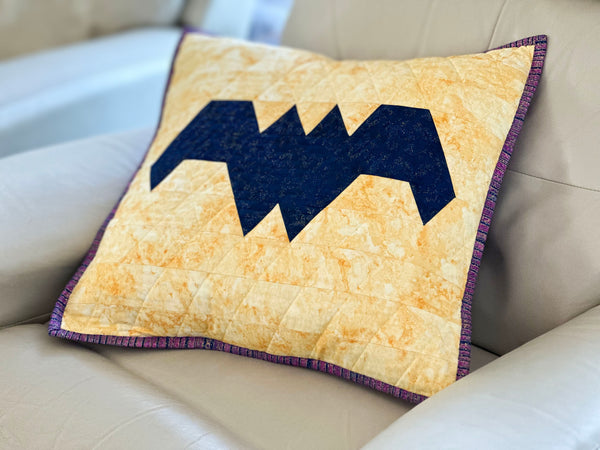
Finishing the Pillowcase
Make one bat block using:
- 2 navy strips (bat)
- 5 yellow strips (background)
Quilt the block to create the pillowcase front.
For the back:
- Cut two 20″ × 13½″ rectangles.
- Hem one long edge on each piece:
- Fold ⅜″ to the wrong side, press
- Fold again, press, and stitch along the first fold
To assemble:
- Lay the quilted front right side down.
- Place the two backing pieces right side up, overlapping the hemmed edges in the center.
- Align raw edges, pin, and sew around with a ¼″ seam.
- Bind the pillowcase using 3 Jelly Roll strips.
- Finish by machine or hand, your choice.

All done! Slip in a pillow, snuggle under your cozy quilt, and treat yourself to a hint of pumpkin spice latte on a chilly day.
- Barnes and Noble
- Indigo
- Amazon (affiliate link)
- Bookshop (affiliate link)
- Books a Million
- Angus & Robertson Australia
- Walmart USA
- Search Press UK