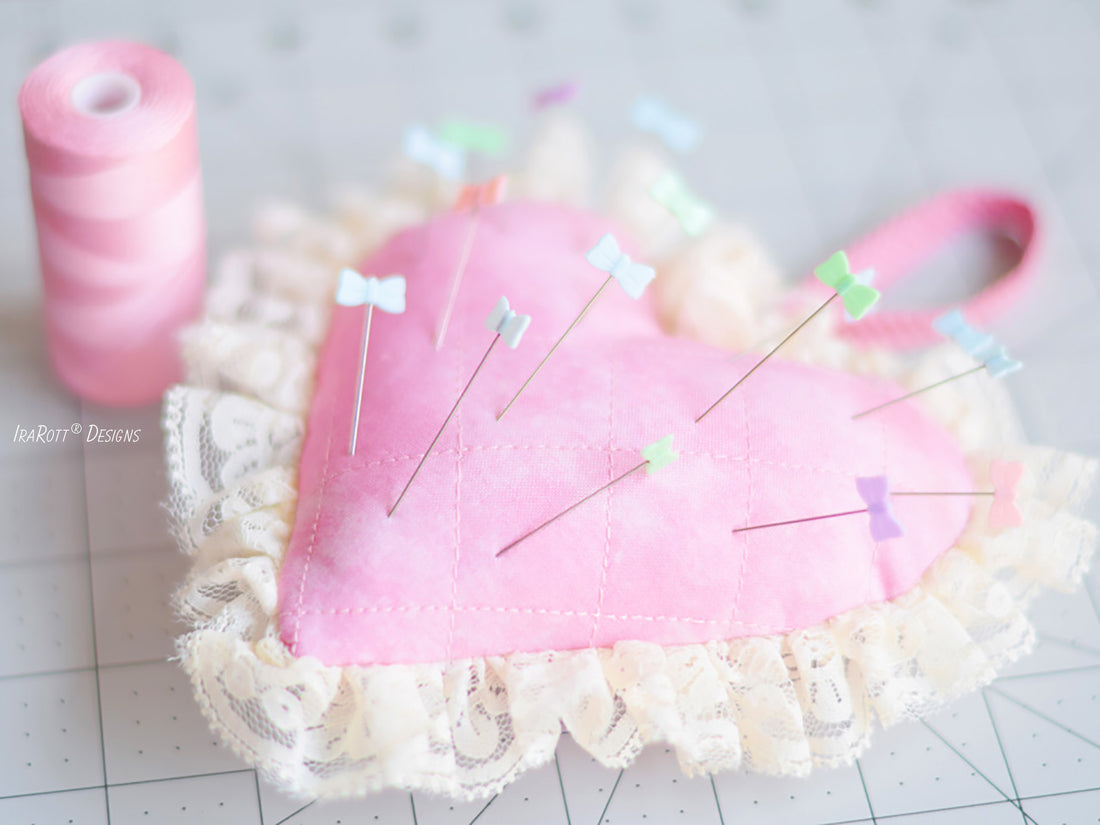
Oh my…welcome February! With Valentine’s Day approaching soon, I decided that it’s time for this sweet pattern to be forever FREE! Cupid’s Heart pincushion is a perfect project for using up your fabric scraps and I hope you will enjoy making it.


What You Need
- Fabric – 1 fat eighth or 2 pieces of 8” X 8” fabric + fabric for hanging loop (optional) 1.5” X 10”
- Cotton batting
- Polyester stuffing or shredded batting scrapsLace ribbon (optional) – 18 ” of gathered-edge ribbon or 60” of straight-edge ribbon
- Aurifil Thread or any other 50 weight cotton thread
- Superior topstitch needle 80/12
- Fabric shears for cutting fabrics
- Paper scissors for cutting template
- Fiskar snips for clipping and making notches
- Basting spray or pins for basting
- Straight pins for pinning pieces
- Printer for printing template
- Walking foot or any other foot suitable for quilting
- Clover point turner or a chopstick for turning corners
Getting Started
To begin, download this PDF file with printable heart template, or download the complete pattern HERE. Save the file to your computer and then open it using Adobe Reader. Print actual size without scaling. IMPORTANT: Do not print directly from a browser, as it may affect your scaling or invert the background color to black.
Quilting
Lay out your fat eighth on top of the batting, with the right side of fabric facing up. Pin or spray baste to hold these 2 layers together and quilt them as you like…for example, stitch a crosshatch pattern using a walking foot with guide. In the examples below I used my previously quilted scraps that I saved from making these Elephant Pillows.
Front Of Heart
Position the heart template on right side of your quilted piece and trace it around the edge. Cut out the heart along the line (1⁄4” seam allowance is included).
Ruffled Ribbon & Loop (Optional)
Fold the raw edges of the 1.5” X 10” strip towards the center and press with steam (1). Fold the strip along the center and press with steam again (2). Straight stitch along the edge (3) and fold the finished strip in half to create a loop.

Fold the lace ribbon in half and sew the edges with a 1⁄4” seam allowance. To gather one of the straight edges, use basting stitch on your sewing machine to sew a scant 1⁄4” around the entire edge (do not backstitch). Hold the ends of the top thread and push the fabric towards the center, spreading out the ruffles evenly. The gathered edge of the ribbon should measure approximately 17.5”; tie the thread ends to secure ruffles.


Pin the ruffled ribbon onto the right side of the heart along the gathered edge (use lots of pins here). Also, with the loop facing down, place it on right side of the heart and pin the 2 other ends in the center of the top edge. Sew around the edge with a 1⁄4” seam allowance. If you are making a heart without ruffles, then stitch only across the top ends of the loop to secure them. Remove pins as you sew.

Back Of Heart
Position the front piece of the heart on top of the remaining quilted piece, with right sides facing each other. Pin and stitch around the edge with a 1⁄4” seam allowance (or just inside the previously stitched line), leaving an opening for turning. Remove pins as you go. Trim away the edges by cutting around the front piece.


Finishing Heart
Clip the concave edges and corners to release tension; cut notches around the convex edges and corners to reduce bulk…being careful not to cut through the seam. Turn the heart right side out through the opening, using a point turner or a chopstick to smooth out the seams and corners. Stuff the heart through the opening (I used shredded batting scraps in the example below). Sew the opening with ladder stitch.


All done, I hope you had a lot of fun!


