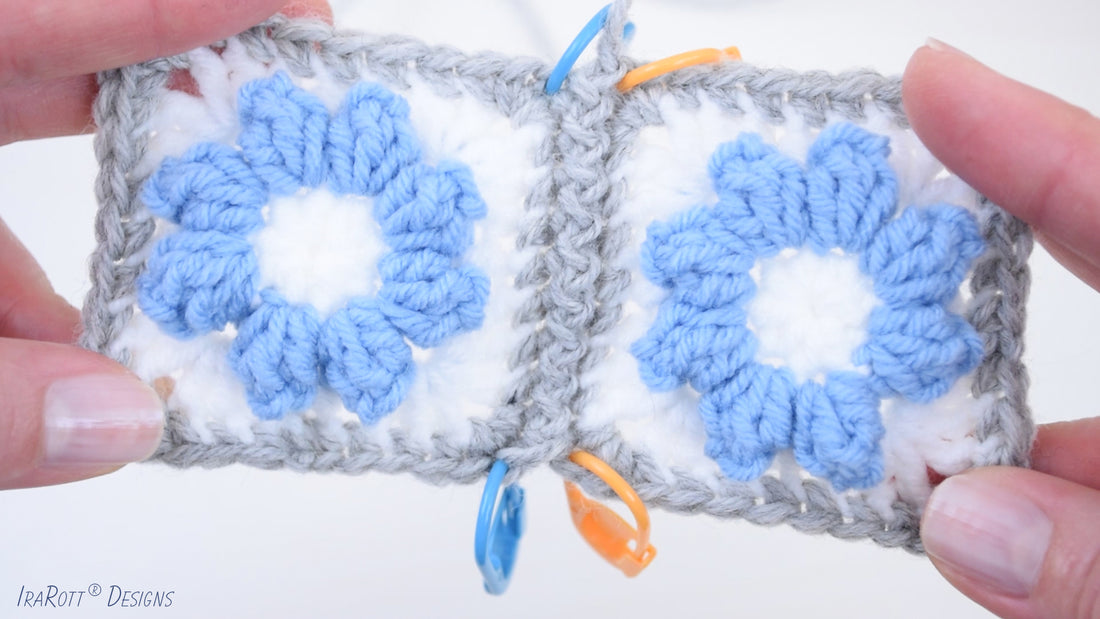
Here are 2 of my favorite methods for joining crochet motifs with a slip stitch. Using these methods, you can finish all your motifs individually, without the need of joining them in the final round.
Ridged Slip Stitch Joining
This is the easiest and most common way to join motifs with a slip stitch. It provides a speedy, yet simple seaming with a ridged appearance on right side.

- Hold 2 crochet pieces with wrong sides together
- Use stitch markers to indicate the first and last stitches
- Join yarn in first stitch of both pieces
- Work slip stitch through the corresponding stitches of both pieces at the same time, inserting the hook through the back loops only (BLO)
- End in last stitch of both pieces and fasten off


Flat Slip Stitch Joining
Join crochet motifs with slip stitch as described below, laying them flat side by side rather than wrong sides together. This method provides a beautiful braided appearance of the flat seam on right side.


- Hold 2 crochet pieces side by side
- Use stitch markers to indicate the first and last stitches on both pieces
- Inserting the hook under the top 2 loops of each stitch: Slip stitch in first stitch of the left motif, then slip stitch in first stitch of the right motif
- Slip stitch in next stitch on the left, then slip stitch in next stitch on the right
- Repeat the previous step across, ending in last st on the left, then in last st on the right
- Fasten off
NOTE: The left-handed instructions are reversed and are shown in second video below.


