Binding 120 Degree Corners

Binding 120 Degree Corners

Just like for binding regular 90 degree corners, you will need to use straight grain fabric strips for binding 120 degree corners. The entire binding can be done by sewing machine, which is super fast and easy.

Materials

  1. Straight Grain Binding Strips
  2. Marking Utensil – I used Pilot Frixion Clicker heat erasable marking pen 
  3. Sewing Machine
  4. Extension Table

Making Straight Grain Binding Strips

  • Cut 2 1⁄2″ X WOF strips from fabric or use precut Jelly Roll strips
  • Holding the strips perpendicularly with right sides together, sew them diagonally and trim off the corners, leaving a 1⁄4″ seam allowance
  • Press the seams open
  • Fold the long binding strip in half lengthwise and press

Sewing Binding (Back of the Quilt)

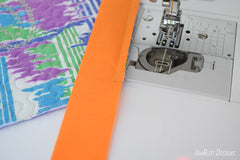
Line up the raw edges of the binding with the quilt edge on the back. Leaving a 6″-8″ tail at the beginning, sew towards the corner with a 1⁄4″ seam allowance; mark a dot in the corner, 1⁄4″ away from the edges and stop at the marked dot with the needle down. Backstitch and finish off.

Binding 120 Degree Corners Binding 120 Degree Corners

Align the next raw edge of the quilt with the ruler on the extension table (if available) or with the straight edge of the desk. Fold the binding away from the quilt and align the edge with the ruler (or the edge of the desk), then fold the binding towards the quilt and line up all edges.

Binding 120 Degree Corners Binding 120 Degree Corners

Mark a dot in the corner, 1⁄4″ away from the edges. Start at the marked corner and sew towards the next corner. Repeat the process until you pass all corners.

Binding 120 Degree Corners Binding 120 Degree Corners

Stop at least 6″ before your starting point. Depending on the size of the project, you can leave up to 10″ space at the end. Trim the ends, overlapping them by 2 1⁄2″ (the width of the unfolded strip). Holding the ends perpendicularly with right sides together, sew them with a diagonal seam. Fold the binding to to make sure it fits properly. Trim the corners, leaving a 1⁄4″ seam allowance. Press the seam open and sew the remaining part of the binding.

Binding 120 Degree Corners Binding 120 Degree Corners

Finishing Binding (Front of the Quilt)

Fold binding to the front of the quilt and sew towards the corner. Stop approximately 2″ away from the corner and fold the binding in the corner. Sew to the corner until the needle hits the folded edge. Stop with the needle down and pivot. Continue sewing around the edge, passing corners in the same manner….and you are done!
Binding 120 Degree Corners

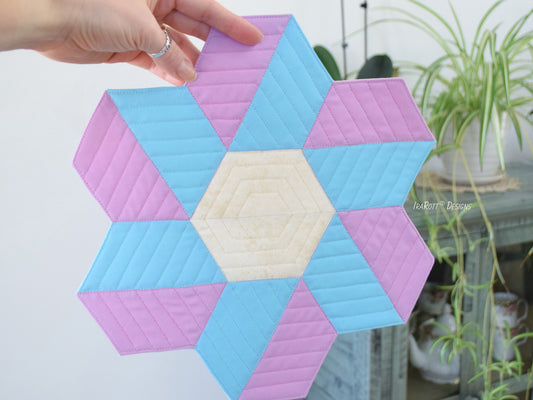
The Hexi Cacti Placemats Pattern featured in this tutorial can be found on our website for those interested in making it.

Hexi Cacti Placemats Pattern

Back to blog
  • Marbled Jellyfish Fidget Toy

    Marbled Jellyfish Fidget Toy

    Marbled Jellyfish is a cute little toy that helps with relieving anxiety, improving concentration, and managing sensory overloads. When fidgeting, simply squeeze the marble from side to side in the body...

    Marbled Jellyfish Fidget Toy

    Marbled Jellyfish is a cute little toy that helps with relieving anxiety, improving concentration, and managing sensory overloads. When fidgeting, simply squeeze the marble from side to side in the body...

  • Ukrainian Heart Pendant Free Crochet Pattern by IraRott

    Ukrainian Heart Pendant Crochet Pattern

    Carry this Ukrainian Heart anywhere you go, just loop it through the side of your purse, key-chain, or a zipper head. I designed this pattern in support of Ukrainian people and...

    Ukrainian Heart Pendant Crochet Pattern

    Carry this Ukrainian Heart anywhere you go, just loop it through the side of your purse, key-chain, or a zipper head. I designed this pattern in support of Ukrainian people and...

  • Pinwheel Mug Rug Free Quilting Pattern by IraRott

    Pinwheel Mug Rug Quilting Pattern

    Smile, spin, and let the wind carry you. I created this lovely pinwheel mug rug for the Paint Chip Challenge in our MQG and I would be thrilled if you...

    Pinwheel Mug Rug Quilting Pattern

    Smile, spin, and let the wind carry you. I created this lovely pinwheel mug rug for the Paint Chip Challenge in our MQG and I would be thrilled if you...

  • Sunflower Power Coasters Free Crochet Pattern by IraRott

    Sunflower Power Coasters Crochet Pattern

    As a Ukrainian symbol of identity, sunflowers indicate the power of sun, prosperity, well-being and peace. I hope you will enjoy making these coasters. This pattern is written row-by-row using...

    Sunflower Power Coasters Crochet Pattern

    As a Ukrainian symbol of identity, sunflowers indicate the power of sun, prosperity, well-being and peace. I hope you will enjoy making these coasters. This pattern is written row-by-row using...

1 of 4